Introducing the Dream Machine - a no holds barred gaming monster PC that we built in conjunction with Maximum PC.
It’s the culmination of a year’s worth of technological development, and the machine we've built now is one of the most powerful and intricate of its kind.
It is an exercise in hubris, neither adhering to any budget, nor any perceived spec—it is the best of the best of what we have available today.
Dream Machine is a concept, not something that should ever really be attempted. It is, by its very nature, an unreasonable machine, beyond any recommendations. So, when no holds are barred, what can you do with the latest and greatest hardware out there? That’s what we’re here to find out—to build, in-house, one incredible system, at one incredible price.
The specs of the beast
As we mentioned earlier, speccing out Dream Machine 2017 was a challenge.
The processing world is in a state of extreme flux right now, with both Intel and AMD providing fantastic solutions for anyone looking to build beyond a quad-core system.
And let’s go on the record: if AMD’s Threadripper had been available when we started the build, with all of its 16 cores, we would have used that, and if Intel’s $2,000-plus Core i9-7980XE were around, that would have been on the cards, too. However, deadlines are a kicker, and you could wait around forever for the next big thing.
Processor: Intel Core i9-7900X
The name of the game this time is 10 cores and 20 threads. Intel’s latest Skylake X parts are some of the gnarliest we’ve seen.
With a reimagined smart-cache superstructure and a top-end turbo of 4.3GHz, the Core i9-7900X is a single-core IPC-demolishing and multi-core rendering powerhouse.
This is also Intel’s first use of its Turbo 3.0 tech. Similar to AMD’s XFR smart overclocking, in applications that aggressively use fewer than four threads, the Core i9-7900X allocates the process to its “best” cores, and boosts their clock speeds up to 4.5GHz.
Anything capable of maxing out more than four brings the entire chip back to the 4.3GHz standard Max Turbo. Compared to last year, we’ve also seen improvements to the number of PCIe lanes (from 40 to 44), an increase in DDR4 memory support, and the DMI (direct media interface between the processor and chipset) improve from 4x PCIe 2.0 lanes to 4x PCIe 3.0, to alleviate any bottlenecks.
The Core i9’s true potential, however, lies in its overclocking capability. It’s an intriguingly mixed bag. And, for once, we’re not limited by silicon instability, but by thermals. There’s no denying the i9-7900X is one hell of a hot chip. Even with a 240mm AIO cooling the 10-cored behemoth, overclocking even to 4.5GHz can lead to thermal throttling hitting that TJMax of 100 C.
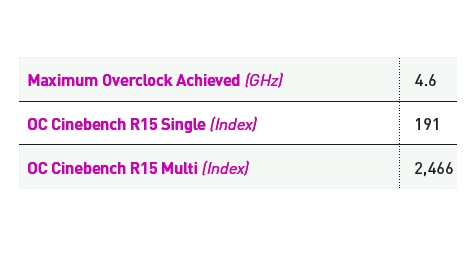
That said, if you can circumvent the cooling conundrums with a sound liquid-cooled setup, it’s not impossible to see 4.8GHz or 4.9GHz—potentially even 5.0GHz—on this powerhouse of a chip, pushing Cinebench R15 scores all the way up to 2,600-plus, and smashing CPU-heavy rendering times into the dirt.
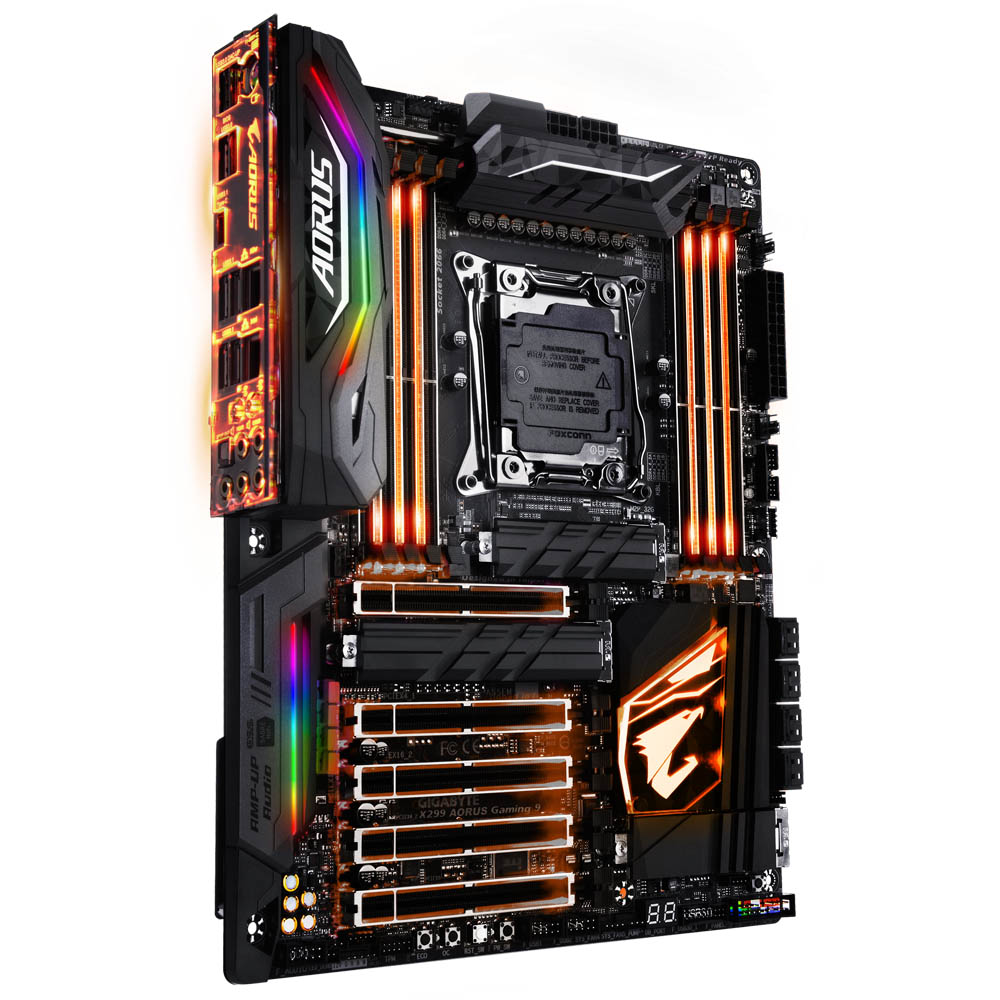
Motherboard: Gigabyte X299 Aorus Gaming 9
When it came to choosing a motherboard, we had a few criteria in mind. We needed a board that could overclock like a champ, with a clean-looking black aesthetic, and have the potential to support up to three PCIe M.2 drives, without any ugly protrusions jutting out from the PCB.
The last part was our main concern. We wanted two 512GB Samsung 960 Pros in RAID 0 for our OS, and a 2TB model for anything else we could think of. Coupled with two old-school 10TB HDDs, plus two 2TB Samsung 850 Pros for even more storage, and connectivity is hugely important.
That left us with one winner: the Gigabyte Aorus X299 Gaming 9, a mammoth of a board to fit inside our equally gargantuan case. It’s one of the only mobos to support more than two PCIe SSDs on the board itself, second only to the Gaming 7, which lacks the heatsinks.
Plus, its onboard audio is exceptional, it features dual eight-pin EPS power for smoother voltage application during overclocks, and five PCIe x16 lanes, in theory enabling us to run three-way SLI in x8x16x8 configuration.
Graphics card: dual Nvidia Titan XP
12 teraflops of pure force, 3,840 CUDA cores, 12GB of GDDR5X, and the full might of Pascal’s GP102 core. Multiply that by two, and what you’re left with is $2,400 (£1770, AU$3000)-worth of pure graphical power.
Pascal was nothing short of a master stroke by Nvidia, making the impressive Maxwell architecture look like a toddler’s plaything in comparison. Designed to put AMD’s Vega on the back foot, we doubt even Nvidia expected what was about to occur.
As AMD vacated the upper echelons of performance GPU computing, Nvidia was left unchallenged. Fast-forward a year and the Titan X (Pascal) of that generation was trumped by Nvidia’s own GTX 1080 Ti, matching it spec for spec, sans one extra GB of GDDR5X.
The solution to derailing its own flagship? Unleashing the full might of the GP102 core on to the world. Featuring an additional 256 CUDA cores, 16 more texture units, and an impressive boost to core and memory clocks, the true Titan Xp arrived to sink its teeth into that upper ecosphere once again. A true 4K gaming card—but at a cost.
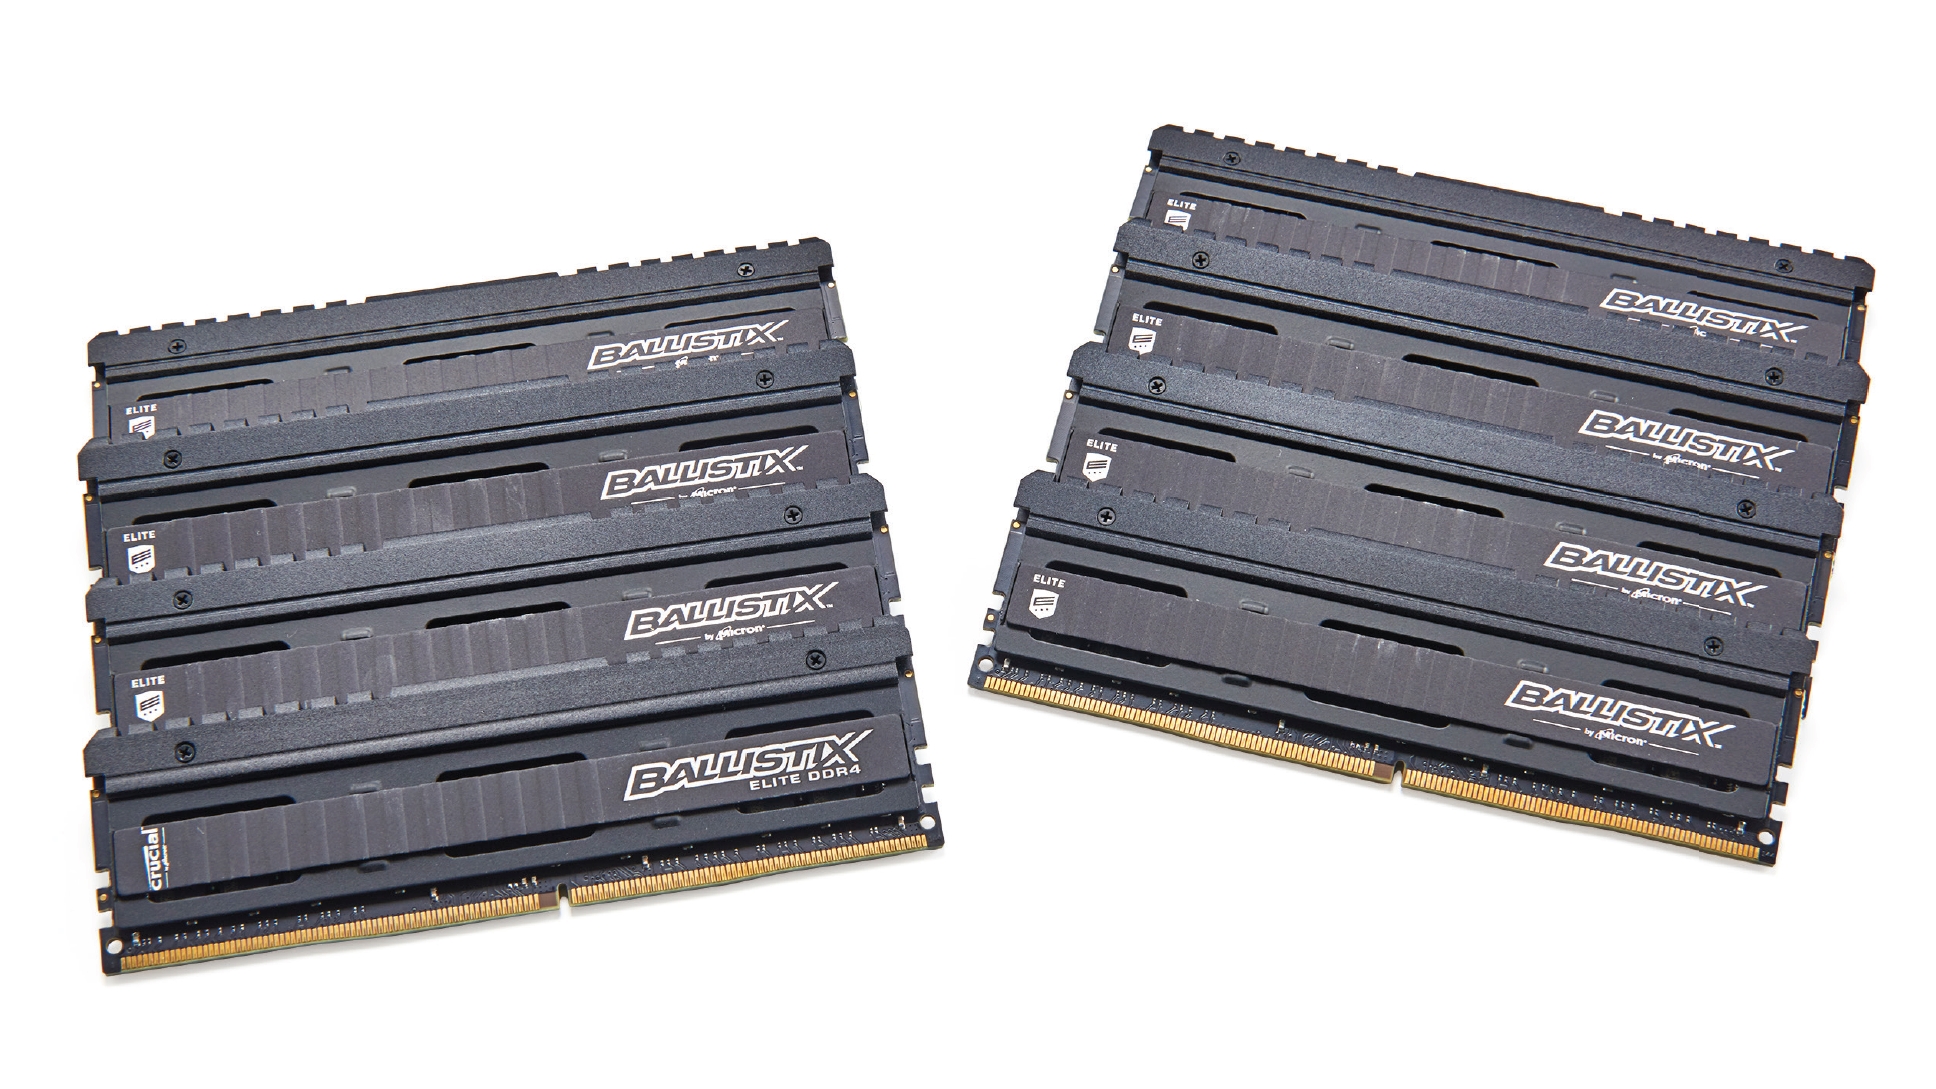
RAM: 128GB (8x 16GB) Crucial Ballistix Elite DDR4-3200
Memory hasn’t changed a huge deal — maximum capacity remains the same at 128GB, and the only thing that really has seen any increase is frequency, which now caps out at around 4,266MT/s.
That said, at that speed, you cut your maximum capacity in half, and as massive advocates of capacity over speed, we simply can’t warrant it over the alternative.
That said, we did want to do something different, so this time around we decided to put all eight DIMMs on ice, stripping them of their stock heatsinks, and liquid-cooling the lot of them.
We’ve always loved Crucial’s memory kits for their stability, availability, and performance, so we requested in a not-so-subtle 128GB (8x 16GB) of its Ballistix Elites, running at 3,200MT/s, with a CAS latency of 16.
It does feel something of a shame to strip these kits down, because the powder-coated finish on the heatsinks is one of the nicest we’ve seen, but the aesthetic finish and extra pep that liquid cooling your memory adds to a water-cooled loop is hard to deny, especially when you’re chilling two banks of the volatile SOBs.
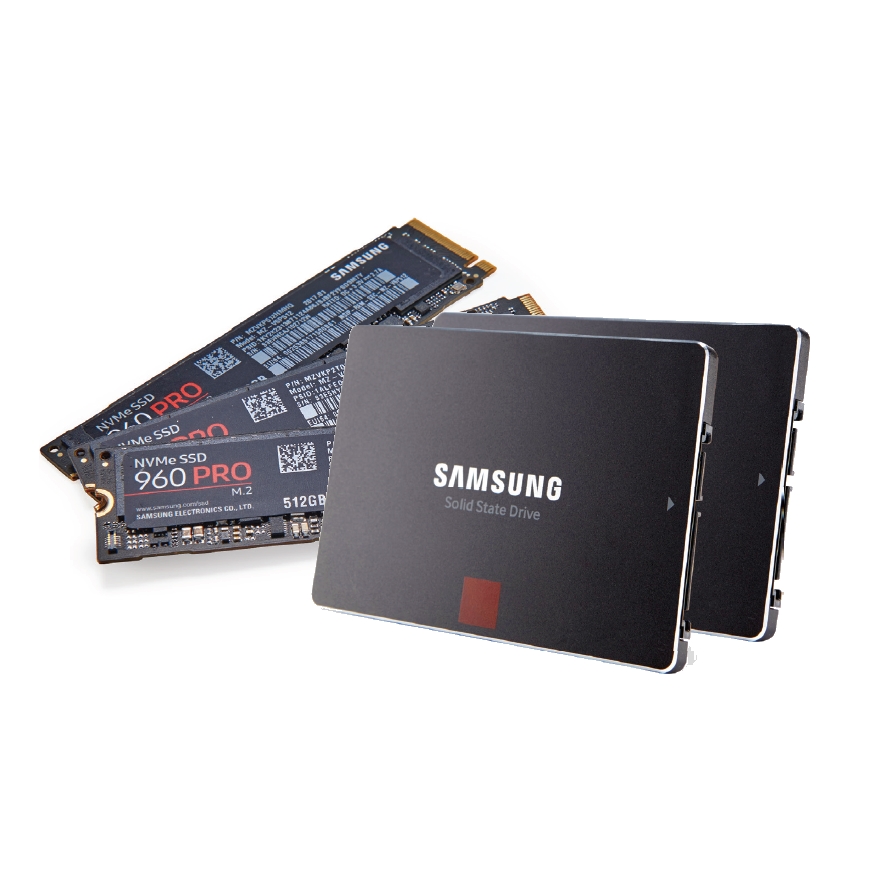
SSD: Samsung 960 Pro (2x 512GB, 1x 2TB), Samsung 850 Pro (2x 2TB)
For our OS storage, we knew we wanted something a little faster than your standard M.2 PCIe SSD, and right now, the only way to achieve that is by RAIDing two, already powerful, PCIe drives.
Although, with the X299 chipset, you can invest in Intel’s on-processor RAID technology for a fee, it is, unfortunately, locked to its 600p drives, which, to be frank, pale in comparison to the likes of Samsung’s 960 Pros.
The chipset, however, still supports RAID 0, 1, 5, and 10, so the solution was simple: two 512GB Samsung 960 Pros in RAID 0 for the OS.
On top of that, we can provide an additional 2TB of standard PCIe storage for any other programs or games we want.
For media storage, we decided to up the ante a little more, and opted for two, now almost ancient, 2TB Samsung 850 Pro 2.5-inch SSDs. We’ve set these up in RAID 0 again, to capitalize on that additional speed, and will be backing up all 7TB of storage on to our 10TB mirrored HDD array.
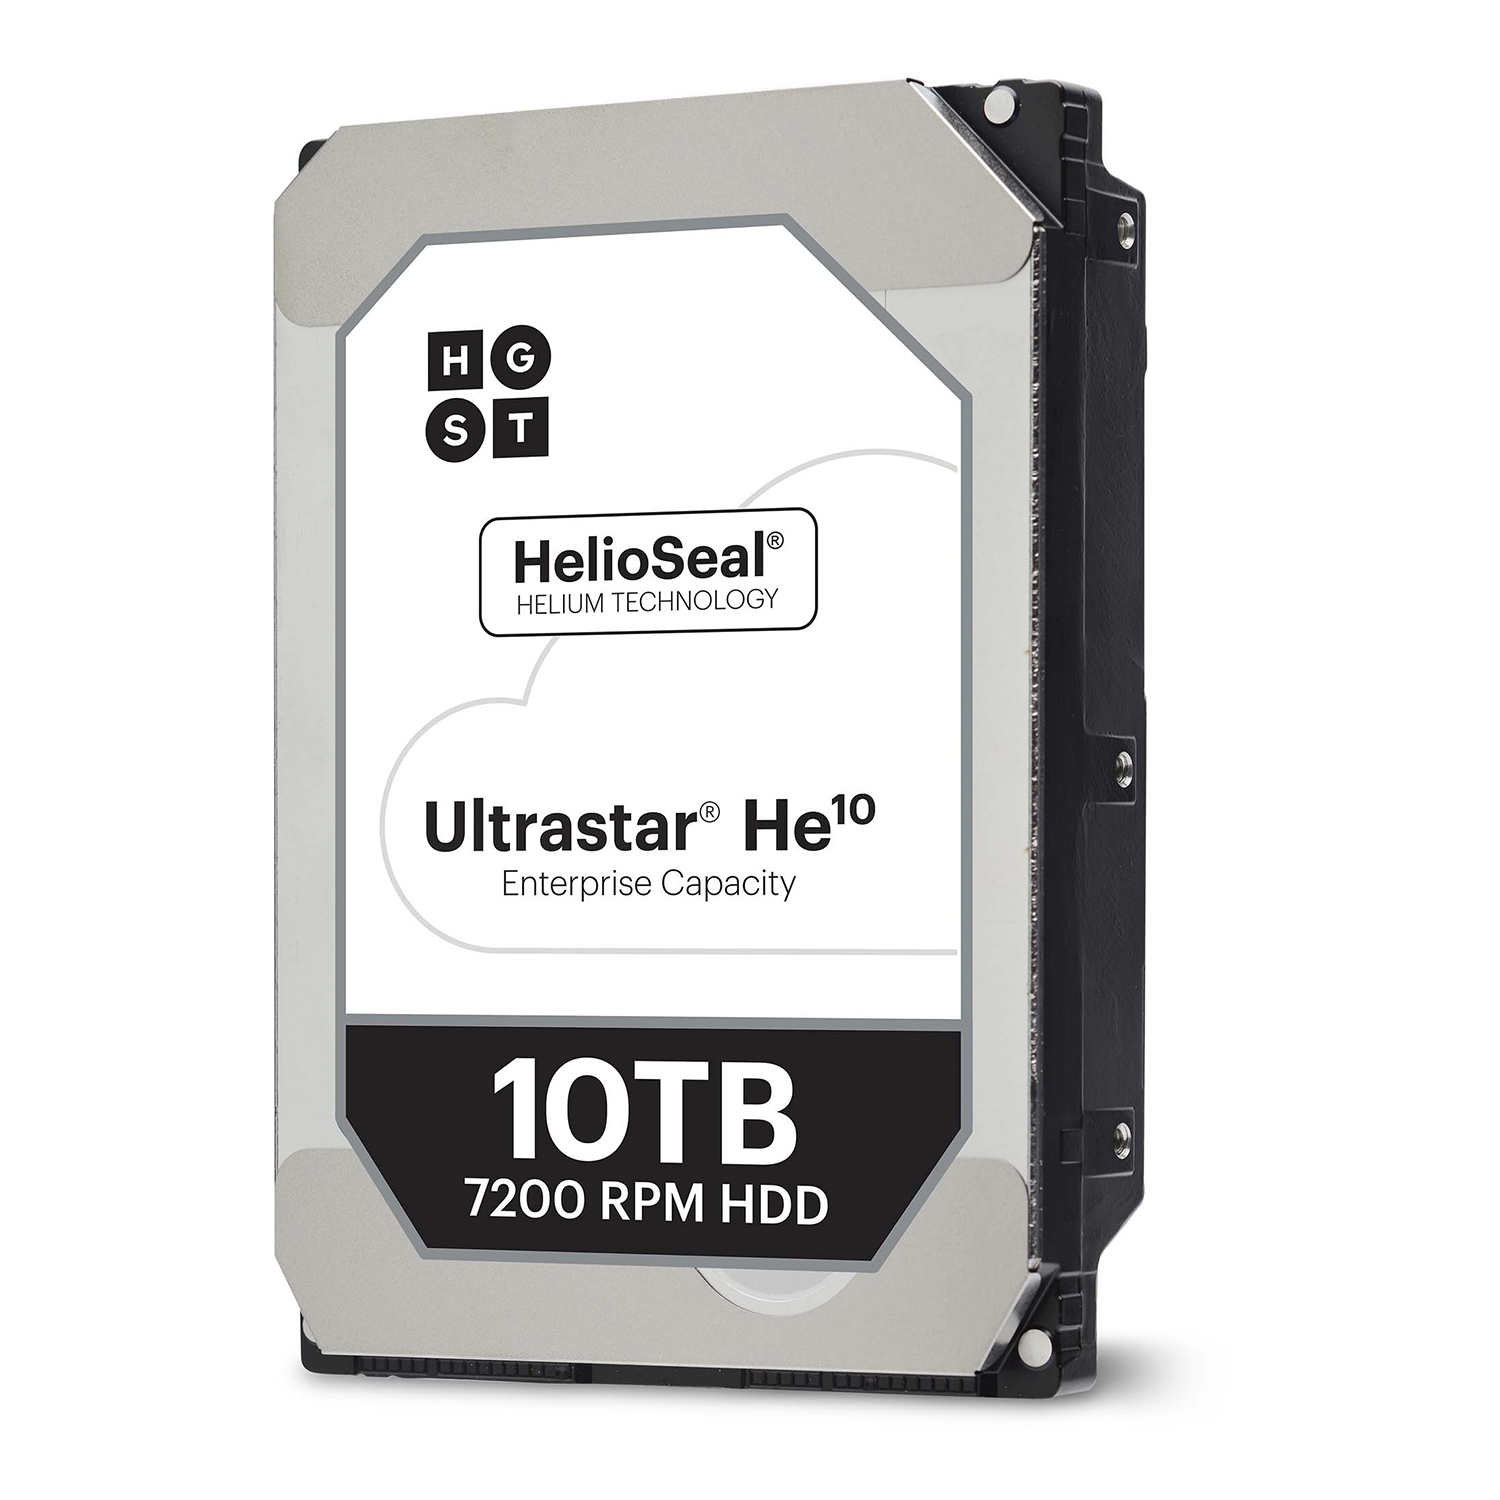
Hard drive: HGST Ultrastar HE10
Speaking of hard drive arrays, why fix what isn’t broken? HGST is now part of Western Digital, one of our favorite spinning platter brands, and these helium-filled 10TB 3.5-inch disks are some of the best in the business.
Setting this pair up in RAID 1 gives us a total of 10TB of mirrored storage, with plenty of redundancy, for an on-site backup of everything and anything on the system.
And with their impressive sequential performance, backing up weekly or even daily shouldn’t be too much of an issue, especially given the infrastructure residing within the rest of the system.
We had quite a debate in the office as to whether to include these or not. The Phanteks Enthoo Elite does have support for multiple HDDs in the bottom tray, although, in reality, we could only use two, because any more would impact on our liquid-cooling plans. And there’s a certain noise element we’re trying to avoid.
Relegating these disks to backup drives, however, does neutralize the noise somewhat as, using incremental backups, these should only be operating for a small part of the day or week.
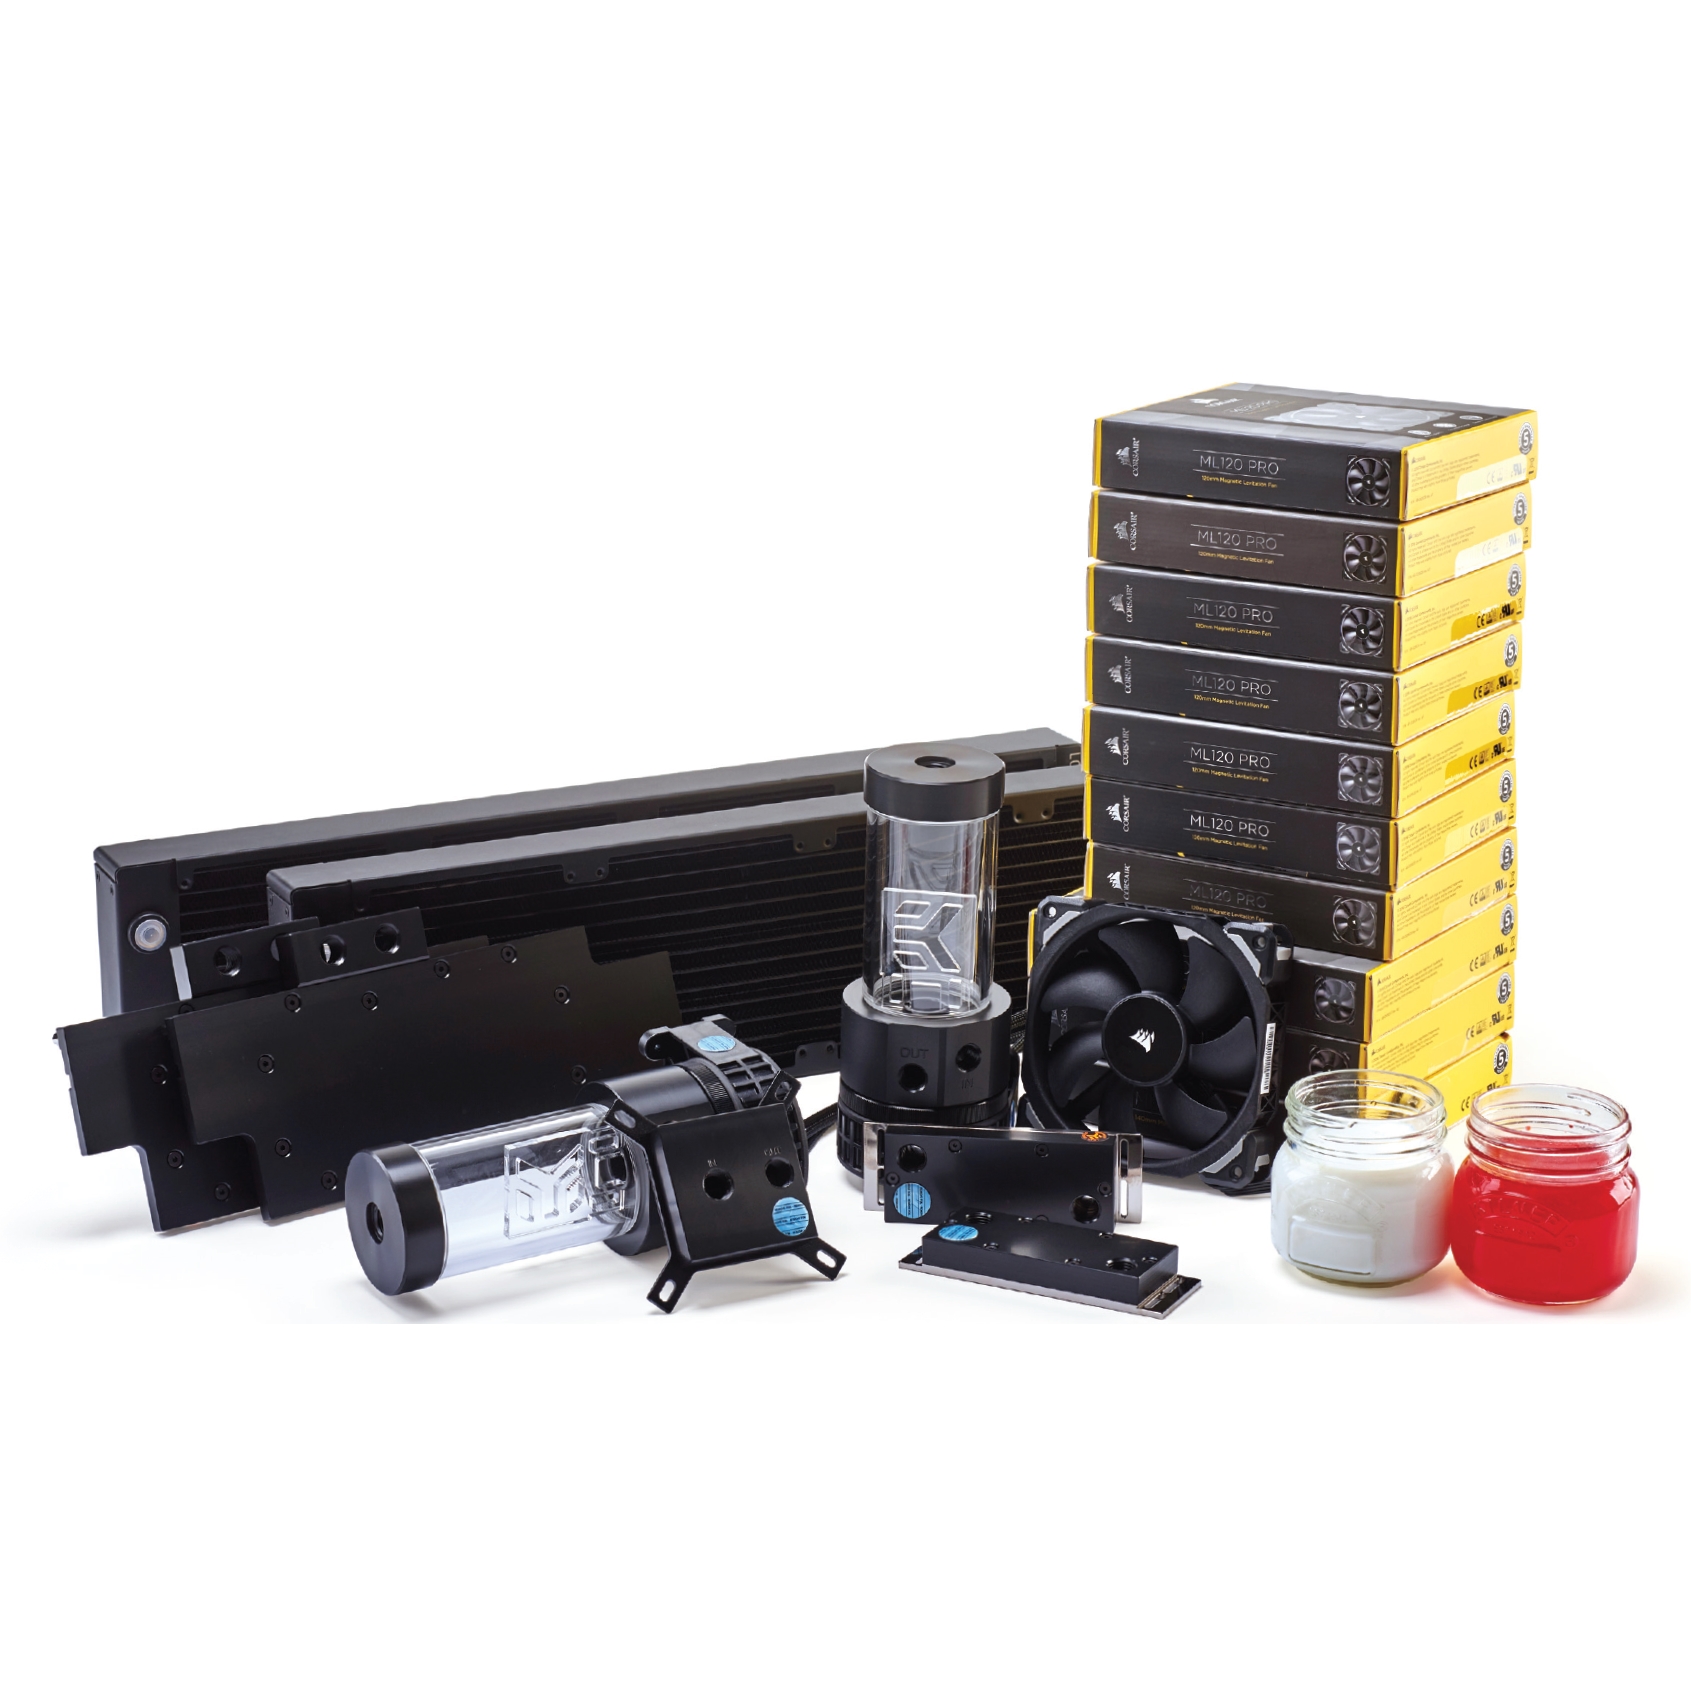
Cooling: EKWB liquid cooling and Corsair ML fans
As soon as we had confirmation of the parts we’d be featuring in our Dream Machine, we headed to EKWB’s website to grab the very best liquid-cooling hardware.
For us, nothing beats the clean, subtle look of EK’s parts. With the Core i9-7900X being notoriously hot under the collar, and those Titan Xps being no slouches either, we also needed some serious fan power to cool the loops, so we went with some of the best we’ve seen this year: Corsair’s Mag Lev ML120 and 140 Pro series. With a huge RPM operating range, impressive static pressure figures, and a fantastic aesthetic, they’re a no-brainer.
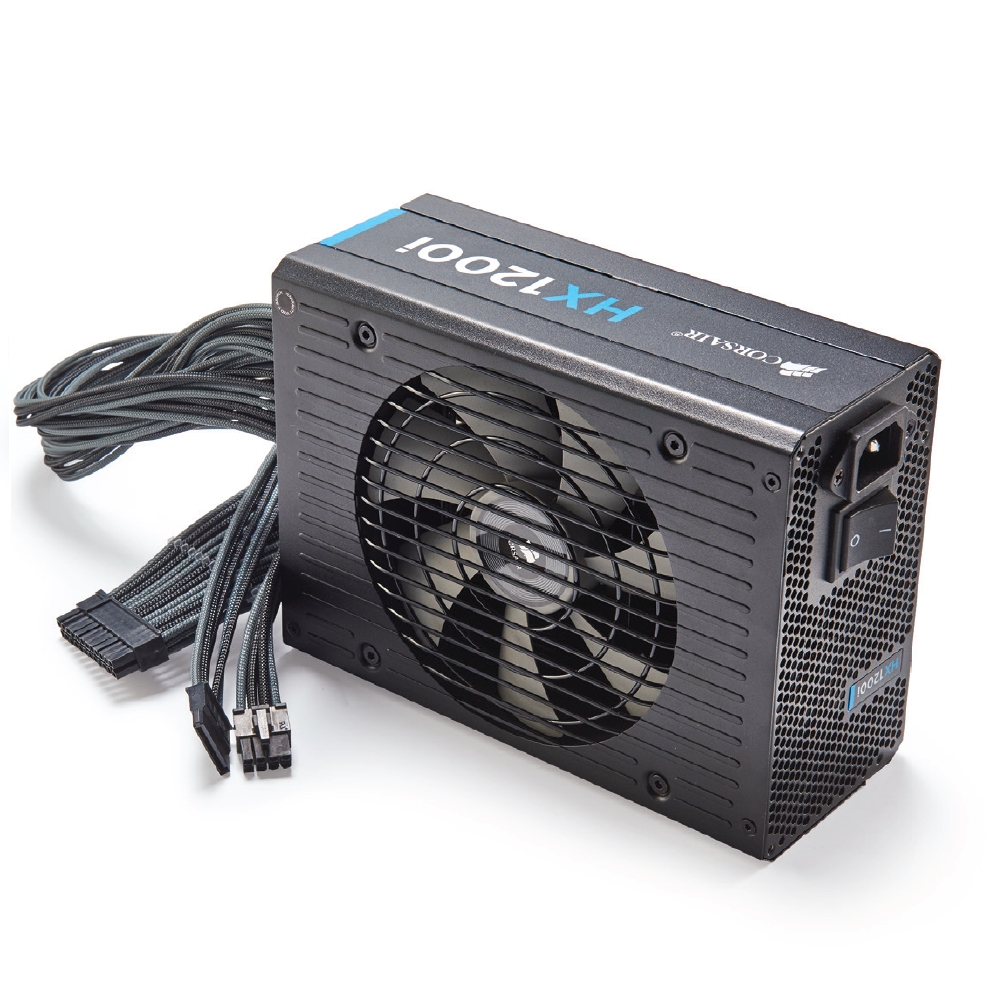
PSU: Corsair HX1200i
The choice of PSU this time around was an easy one to make: We went straight for Corsair’s HX1200i. After using the 1,000W variant last year, and appreciating just how quiet it is with its 0dB fan tech, plus the fantastic Platinum energy efficiency rating, there really was no other choice.
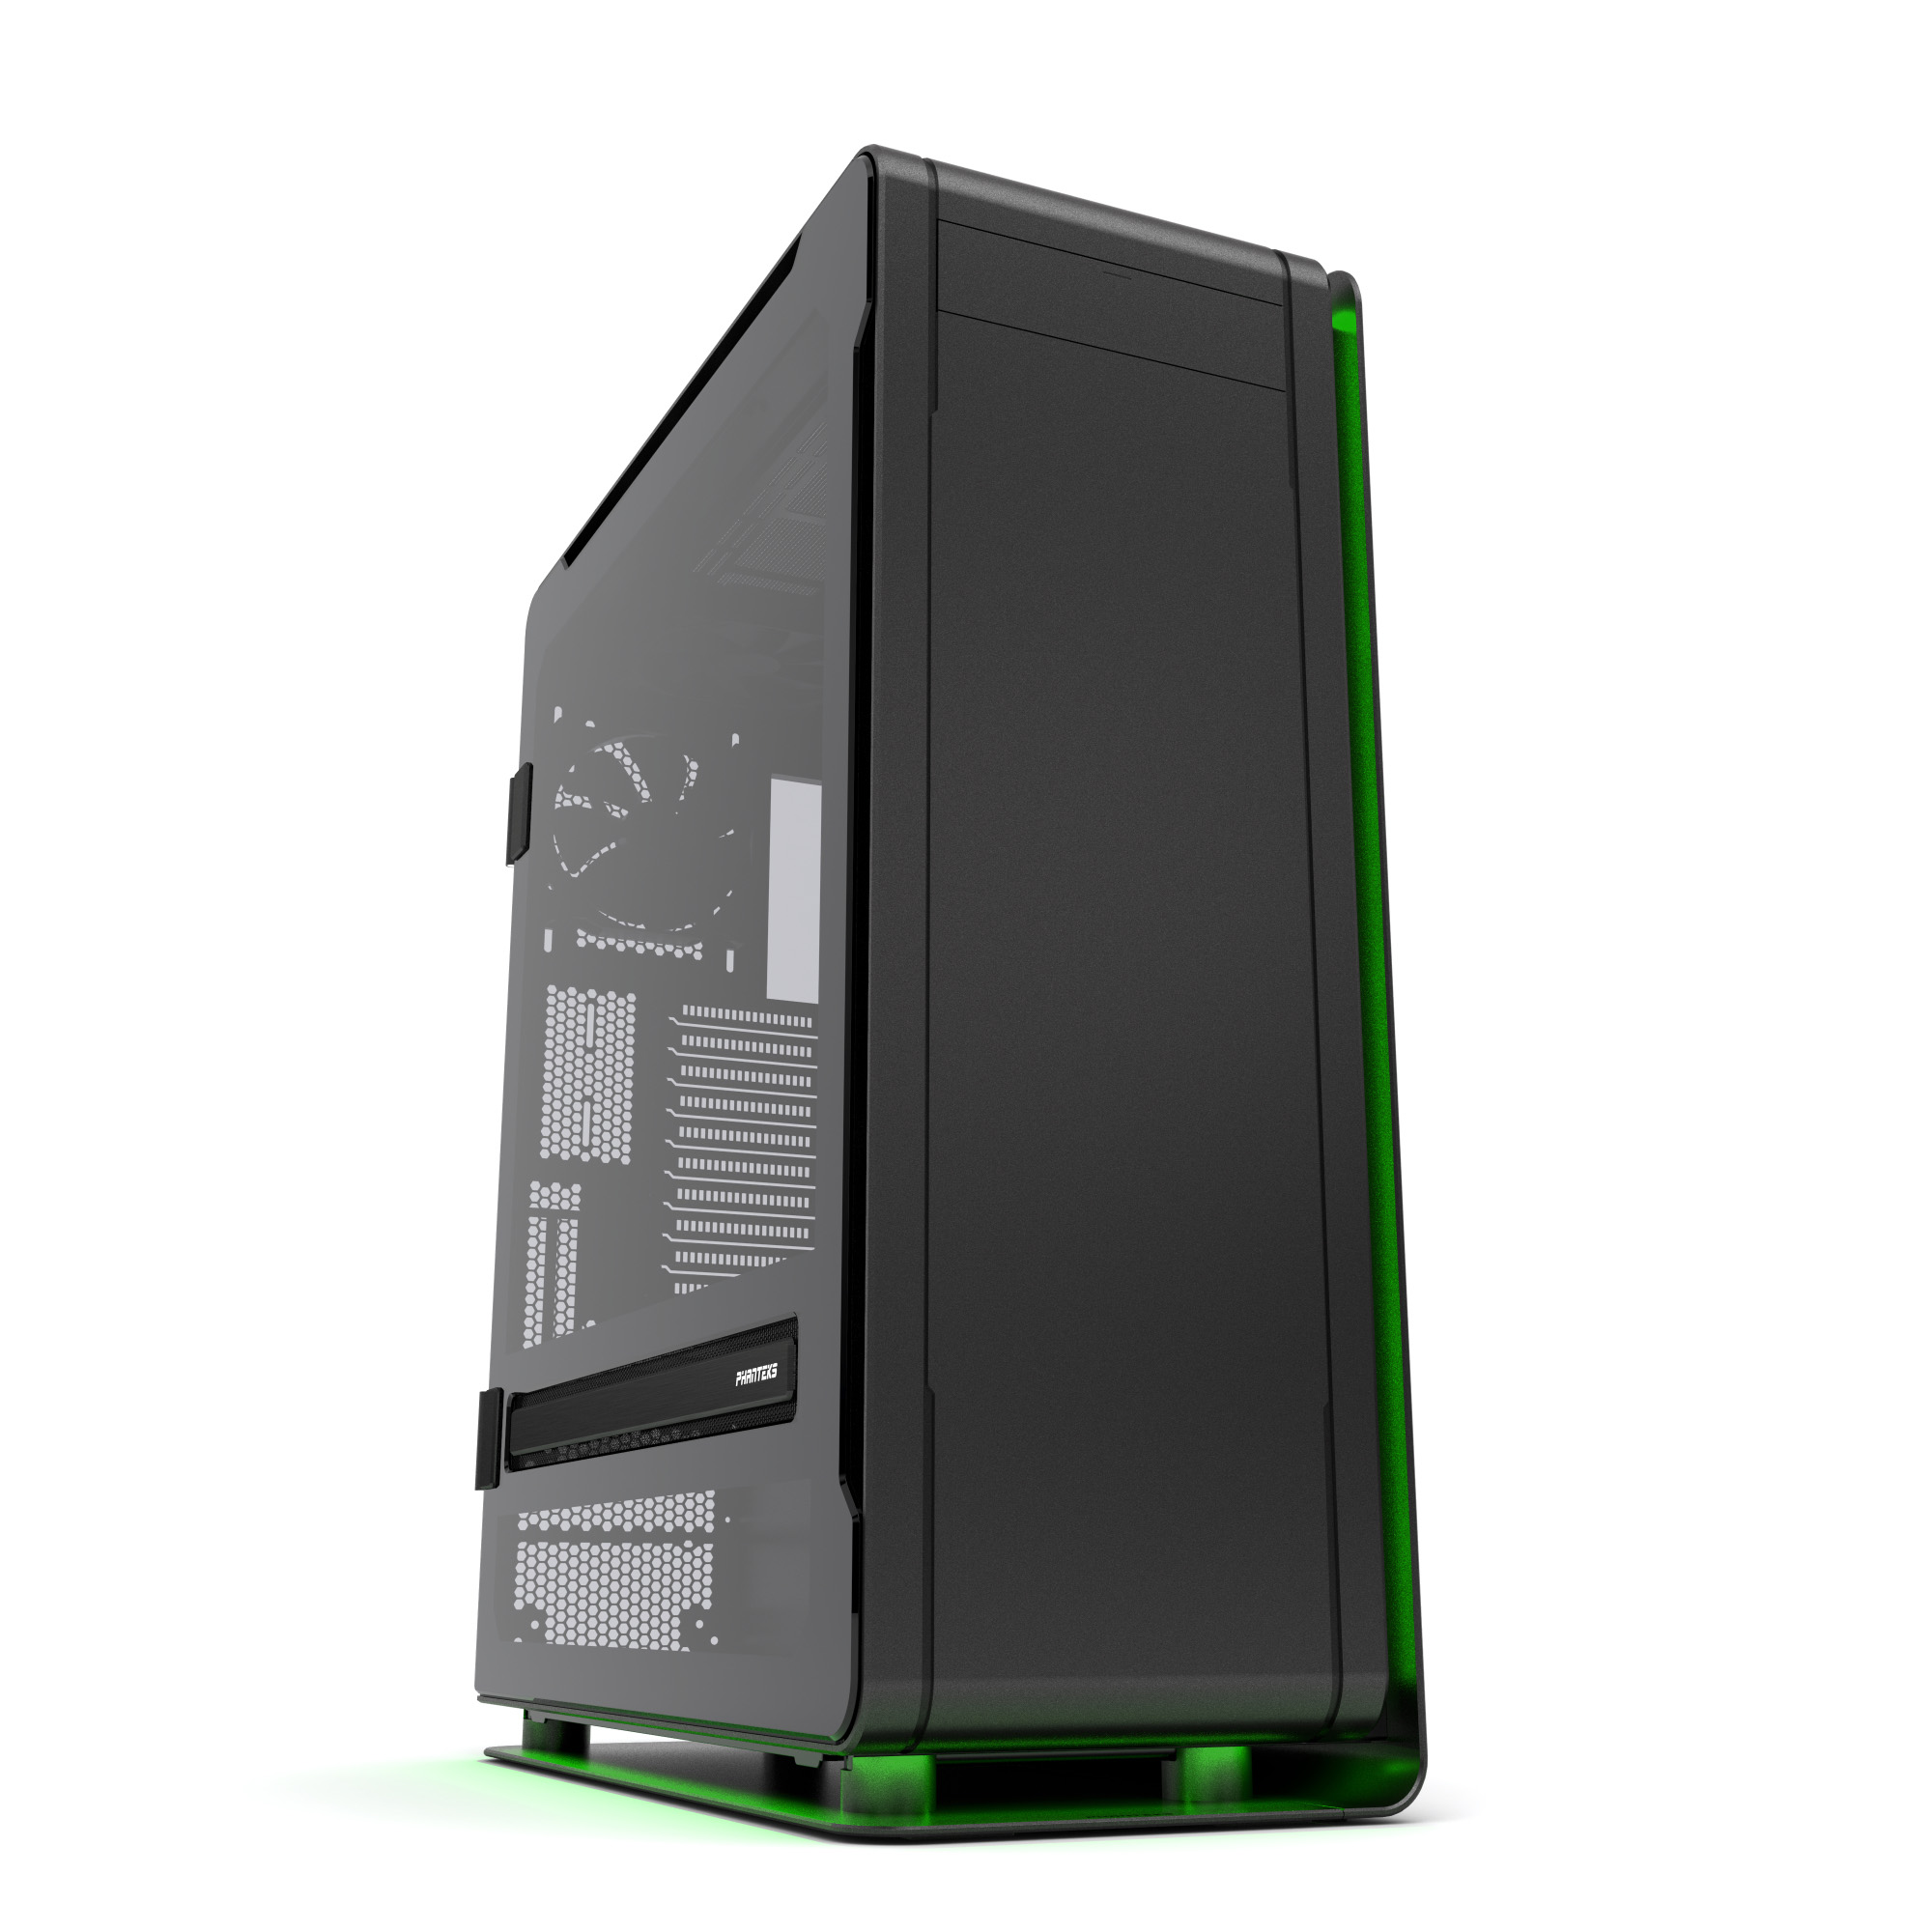
Case: Phanteks Enthoo Elite
The Enthoo Elite is undoubtedly the king of all fulltower cases. Coming in at a staggering $900 (around £660, AU$1100), this compartmentalized leviathan has the potential to support both an ITX and an XL-ATX system simultaneously.
Combine that with its class-leading liquid-cooling support and exceptionally premium build materials, and there’s simply no argument about why we chose this case.
The Elite comes in its own flight case to protect its massive 66lb bulk (when empty). It has two sets of accessory kits, and supports up to 20x 120mm fans, or 17x 140mm fans (with five included).
Phanteks hasn’t spared any expense with build materials, either, utilizing 4mm anodized sandblasted curved aluminum, a powder-coated steel chassis inside, and 4mm tempered glass with mesh ventilation baked in. The list of features is almost endless, and the Enthoo Elite even comes with a five-year warranty.
We give you an insight into the many troubles that we encountered when putting together this year’s truly titanic Dream Machine.
This is not a build for the faint-hearted.
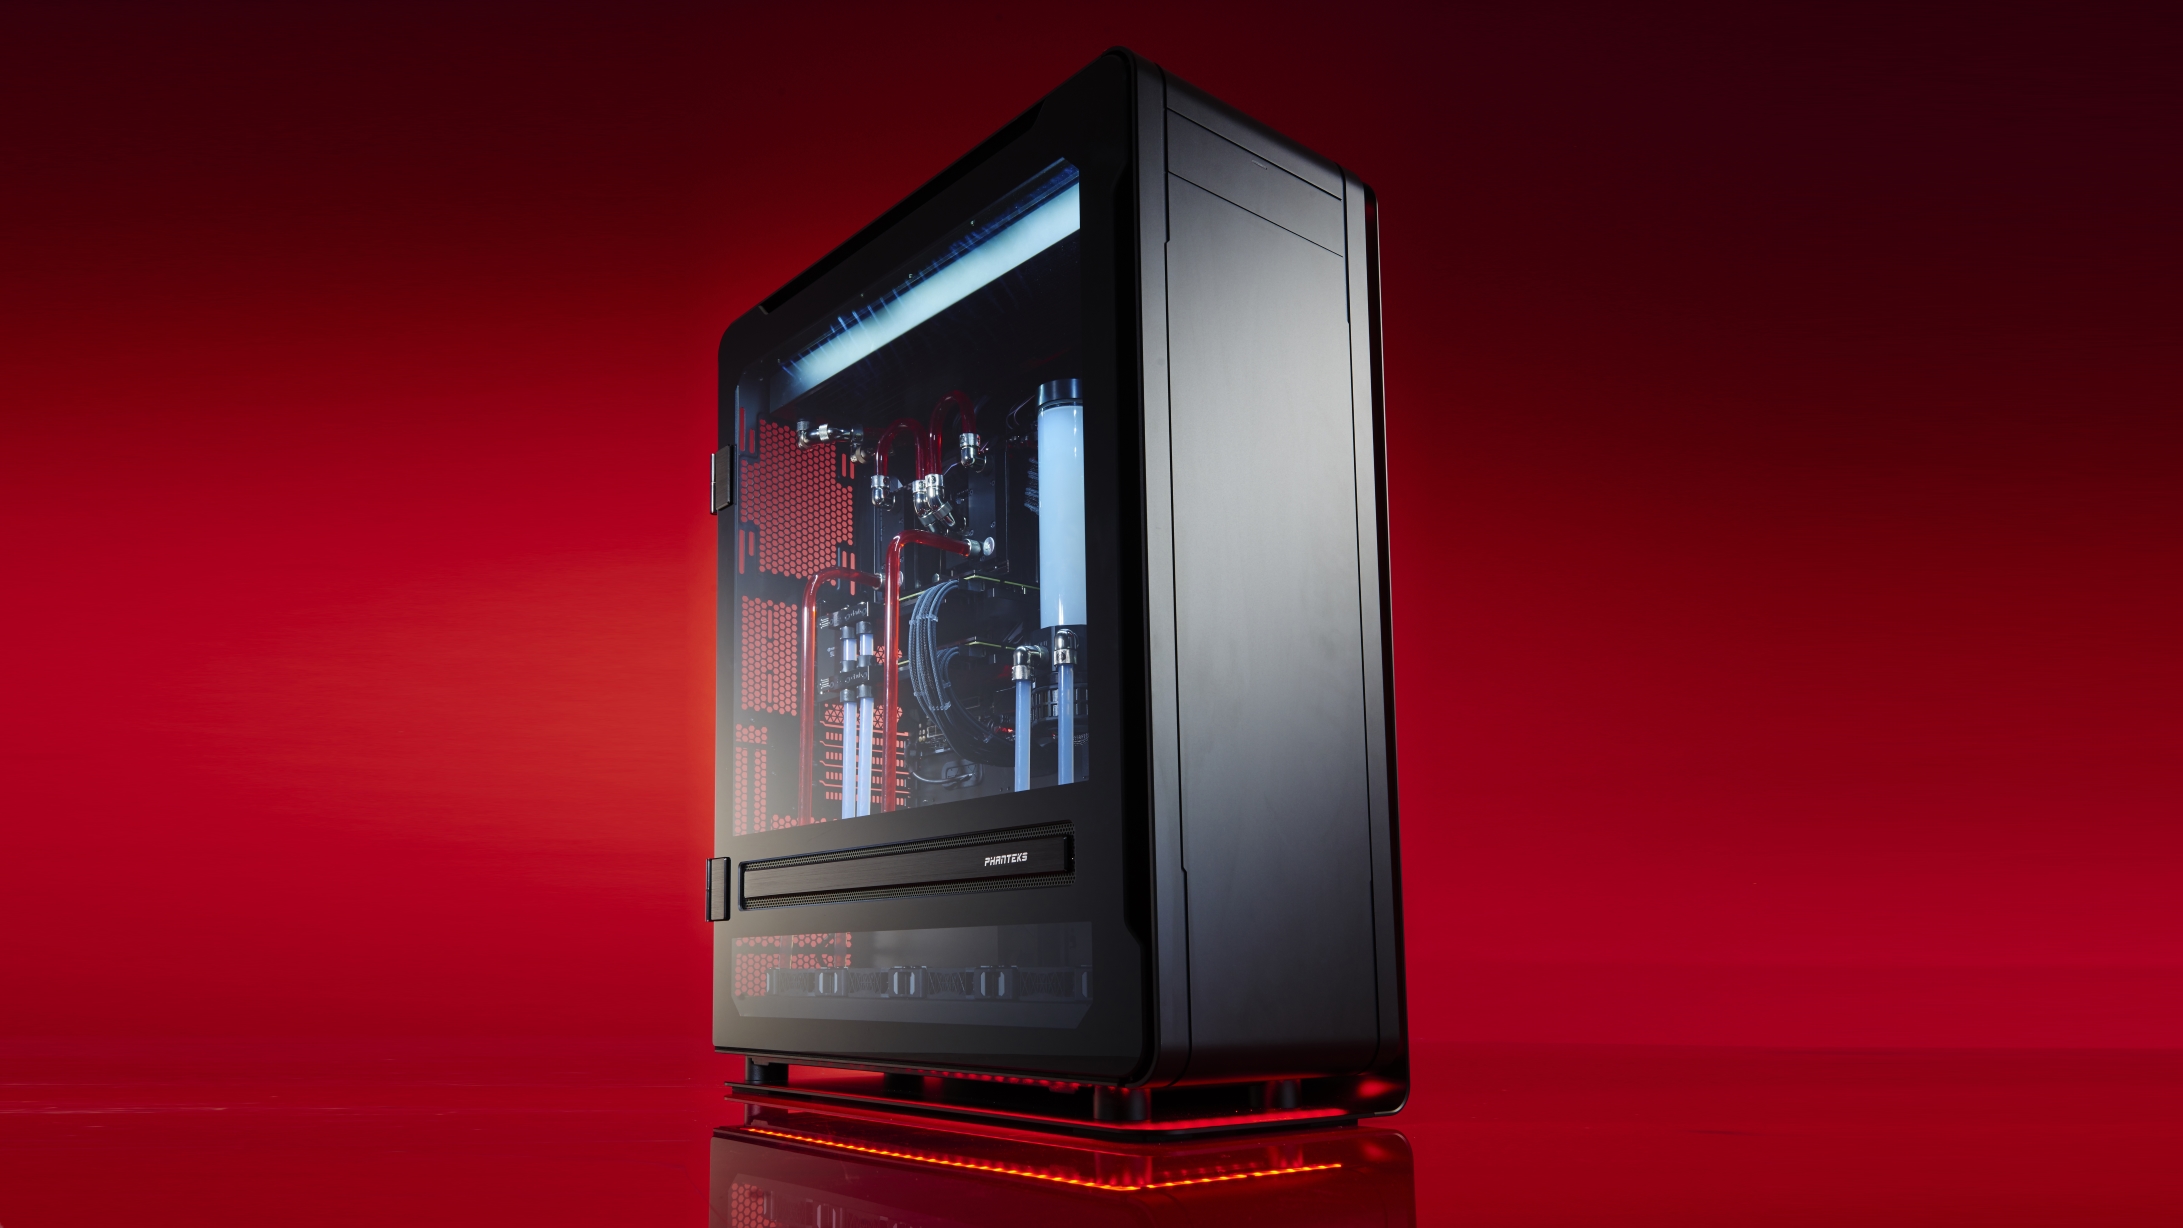
The dream realized
Dream Machine 2017 took a lot out of us. It was a mammoth task that took three months to plan, and over five days to build and shoot, driving everyone involved to the brink of insanity.
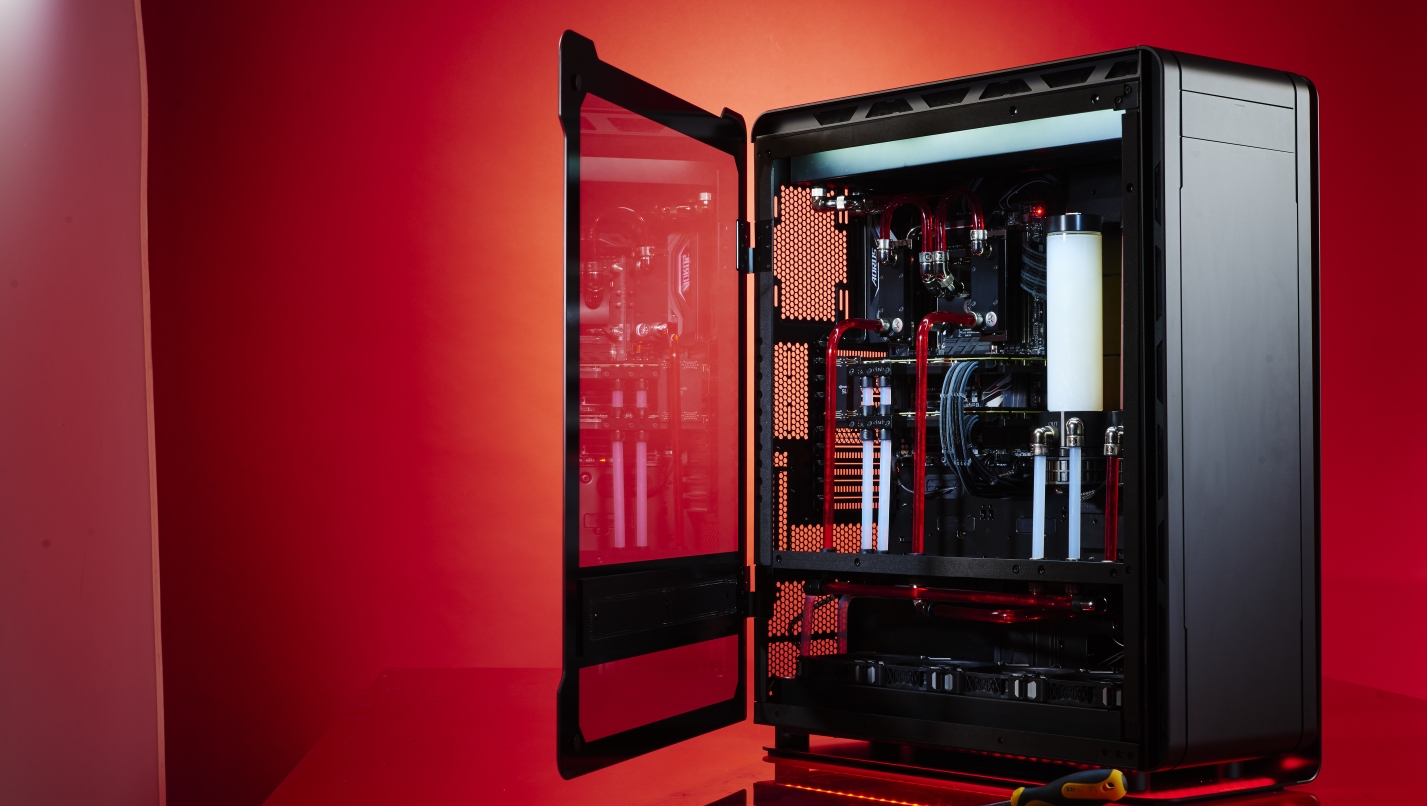
Figuring out how the loops were going to operate, in which direction, and how the tubing runs were going to fit together was testing. Couple that with the modding of the panels to allow for the pass-throughs, the careful cable management to ensure the CPU power reached, making sure the fans fell into place, the blocks were installed correctly, and everything else was a success, and it was incredibly draining.
We’re not afraid to admit when we make mistakes, and when it comes to the finer pursuits, such as liquid cooling and case modding—of which there was a lot this year—we still have much to learn.
Tubing runs can always be cleaner and tidier, but it was the DIY aspect of the modding that really caught us off guard—mounting the reservoirs and the pass-throughs in particular.
Using the correct drill bit to get through that aluminum is imperative, as is using the right technique. We certainly could have been more precise. Working with the steel panel behind the reservoirs also proved tricky.
If we did it again, we’d make sure that the pass-throughs below the GPU were better marked and separated, to make them more parallel, that the reservoir mounting in the back of the steel plate was cleaner, and that the tubing runs in the back of the chassis consisted of soft tubing, making it easier to route the tubing, tidy the cables, and be safer to transport.
That said, being flexible helped. There are 86 separate fittings in this build, in all sorts of combinations. The CPU block, for instance, uses two extension fittings at the base of the two G1/4-inch threads, followed by two 45-degree rotary fittings on each side, then a hard compression fitting on the end, to create an extended 90-degree fitting, with a bit more height to give some wiggle room with those top two tubing runs.
Additionally, we used a combination of 45-degree fittings with unused pass-through fittings to connect two lengths of tube at the back of the motherboard tray, to enable us to run the loop from the uppermost radiator to the CPU pump at the bottom of the chassis.
And, of course, finding some way of mounting the hard drives in the back of the chassis (potentially on the back of the reservoir tray) would have been far nicer than our solution, which was to mount them on the included Phanteks mounting trays, on the right, slightly above the bottom radiator at the front of the case.
We removed them for the photo shoot, but it’s certainly possible to run them like that, forsaking a touch of airflow over that bottom radiator.
Naturally, this isn’t where our story ends. We’d tested the CPU, memory, hard drives, and GPUs outside the chassis, before we liquid-cooled them, but the one thing we hadn’t done was test the motherboard. We just didn’t have the time, as it arrived on the day of the build—so, after all the tinkering, building, and filling of the loops, on first boot we received a memory error, implying that we either needed to change the memory channels, or reseat them.
Less than ideal, given what our setup entails. In short, using the two T-blocks at the top of the chassis, we attached a ball valve, drained off the CPU loop, removed the memory blocks, reseated the memory, and the problem was solved.
Such are the potential setbacks of hardline liquid cooling.
That said, all in all, it’s a phenomenal build. On the next page you'll see our benchmark results that show just how powerful this machine is, and it’s certainly a beauty to behold.
Combine those looks with sub-50 C temperatures and minimal noise, and it’s hard to argue with just how nice a system it is. The big question is, where do we go from here?
Summing up the concept of Dream Machine in a single sentence is difficult. It’s a labor of love for those who work on it, often taking months to source the parts, plan the build, and finally construct the beast.
But, in a lot of ways, it’s impractical, implausible, and excessive in its ambition. We’d never, ever recommend you buy or build a system quite like it, because it’s just not a feasible investment.
That said, Dream Machine 2017 is a fantastic insight into what the very best of today’s hardware can achieve.

Over the past few years, we’ve looked ever deeper into liquid cooling as an avenue of thermal venting for these monster machines, because it offers multiple benefits. Whether it’s a reduction in noise, lower thermals, or higher overclocks, liquid cooling to this degree, for those who have the cash and the patience, is a no-brainer.
On top of that, in the office, we collectively feel that Dream Machine should be a challenge.
But performance is the kingpin that holds this concept together, and all the cooling in the world does little if you’re running a Pentium processor and an Nvidia GT 720.
Luckily for us, then, Dream Machine 2017 comes rammed with the best hardware around.
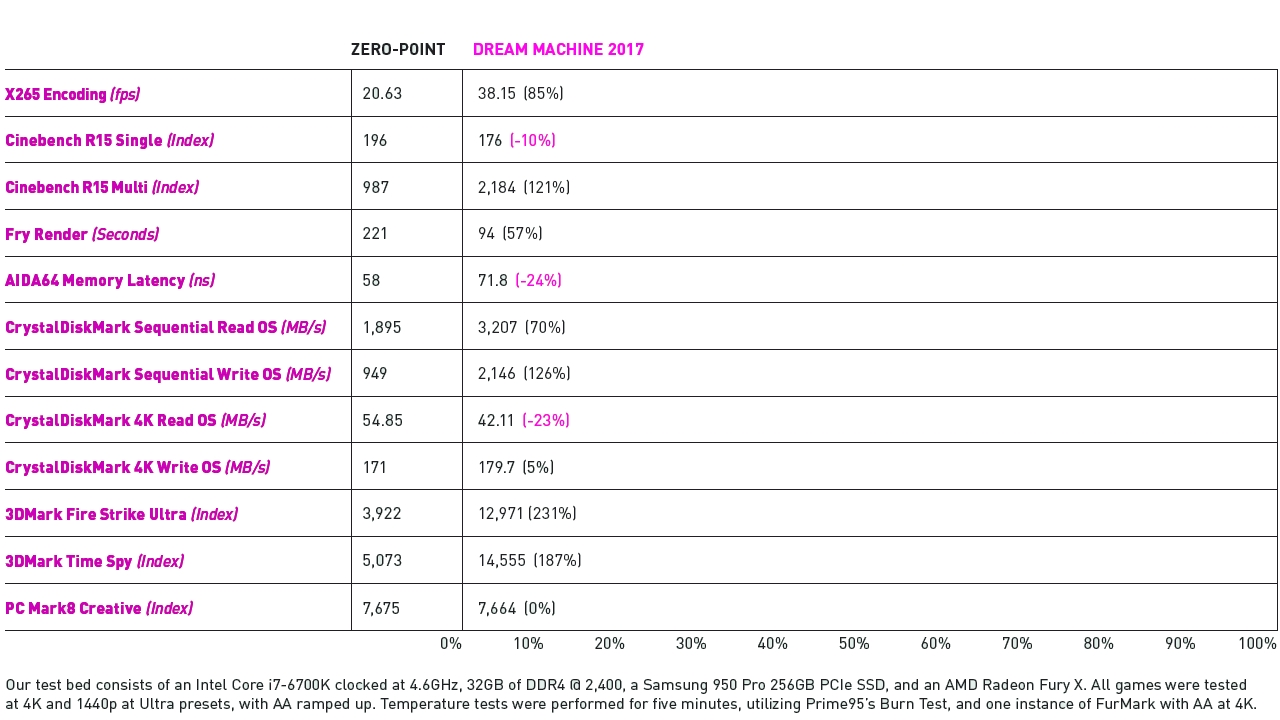
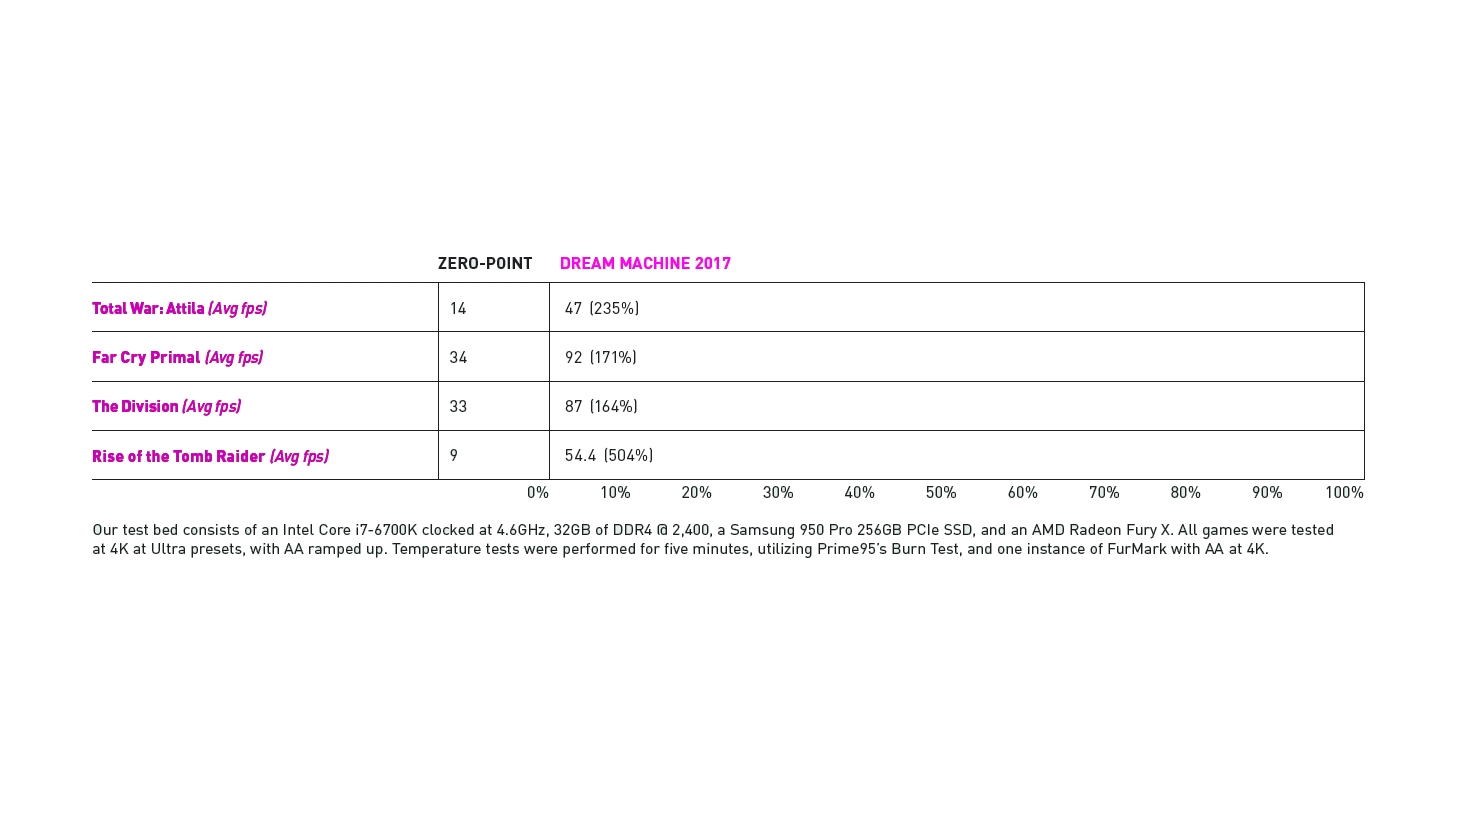
Unsurprisingly, it demolished everything we threw at it. Whether that was processor or GPU-bound benchmarks, it destroyed our zeropoint entirely—in some cases by nearly 500%.
It did lose out in a few areas, though. Our PCIe SSD M.2 RAID 0 array was excruciatingly lackluster, presumedly because we’d saturated the DMI between the chipset and the processor with those GPUs and three PCIe M.2 SSDs.
And single-core performance is still lacking compared to its high IPC Skylake competition.
As far as cooling goes, Intel is still scrimping on the thermal interface material between the processor die and the heatspreader, unfortunately. With 1.25V, you can see temps spike up to 80-90 C (still lower than a 240mm AIO), but as soon as the load drops, it’s almost instantaneously back to idle temps.
Overall, though, Dream Machine 2017 is one burly beast of destruction, filled to the brim with the best the world has to offer, and we’re exceptionally proud of it.
Temperature benchmarks
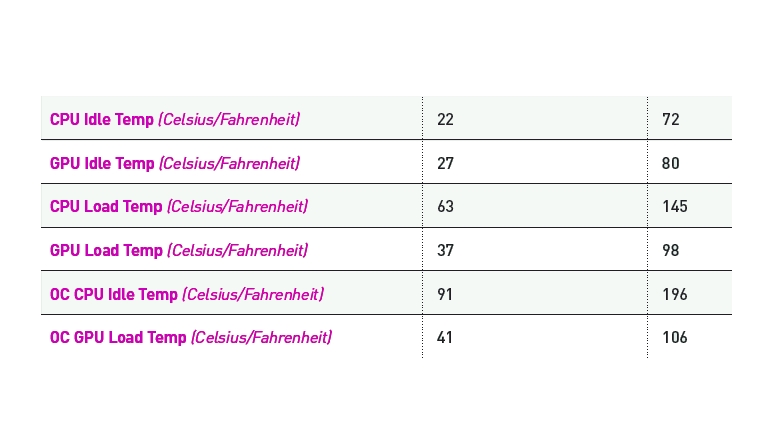
Overclock benchmarks
Benchmarks
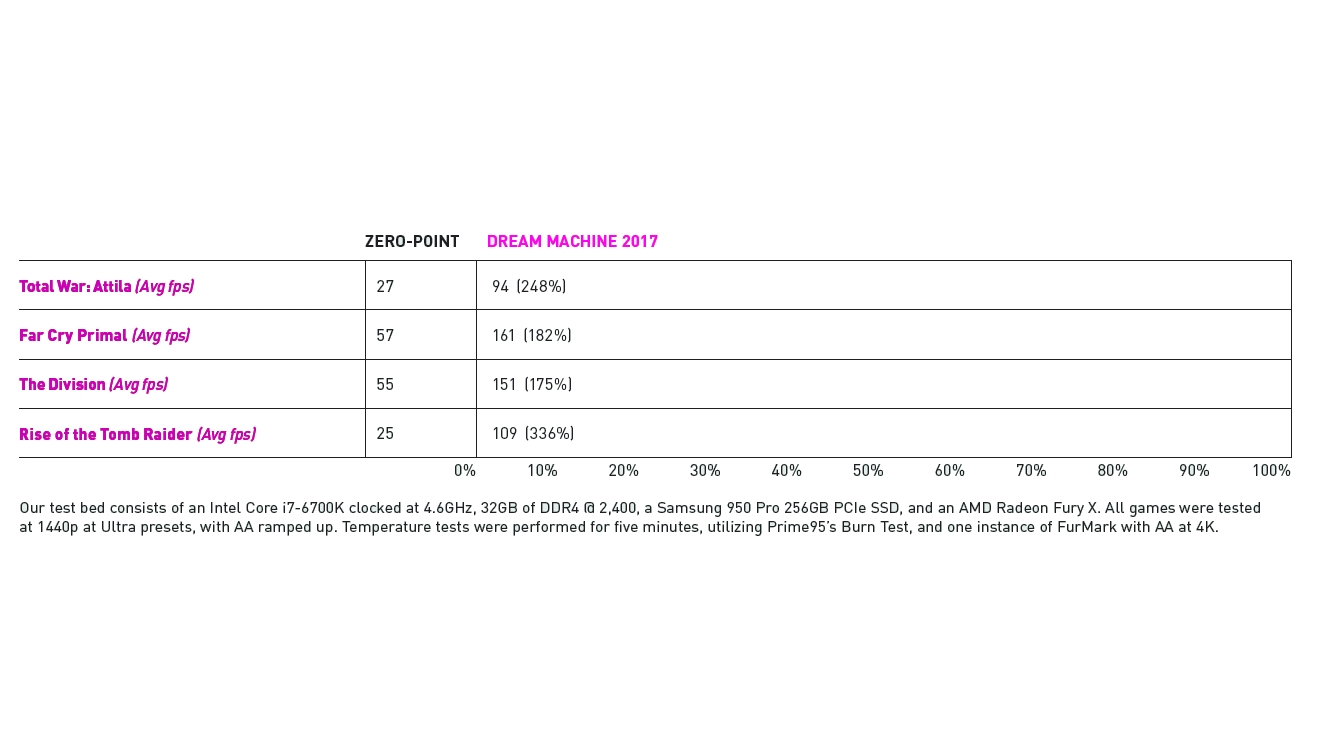
1440p gaming benchmarks
4K gaming benchmarks
- For the full story of the Dream Machine 2017 build, subscribe to Maximum PC
Author: Zak Storey
Published at: Mon, 25 Sep 2017 14:13:03 +0000

No comments:
Post a Comment